Audio cleaning can make a recording sound better, but it can also make it merely sound louder, brighter or more processed. Those are not the same thing. A louder version may seem more impressive during a quick comparison, even when the speech has become harsher or less natural. That is why it helps to test the result carefully rather than trusting your first impression. Video Voice Cleaner includes comparison options that make this easier. The goal is to decide whether the cleaned version is genuinely clearer, more comfortable and more useful than the original.
Why Loudness Can Mislead You
Human hearing tends to favour the louder version during a quick comparison. This can make a processed recording seem clearer even when the main difference is simply increased volume. A louder voice may appear more detailed, more confident and easier to understand for the first few seconds. Once the levels are matched, however, harshness, distortion or missing detail may become easier to hear. This is why loudness should never be the only measure of improvement. A fair test compares the original and processed versions at roughly similar listening levels.
The simplest approach is to lower the volume of whichever version sounds louder before making a judgement. You do not need specialist metering software for a basic comparison. Use the playback controls and adjust the volume until both versions feel reasonably similar in strength. Then listen again for clarity, naturalness and background reduction. This removes much of the psychological advantage created by extra volume. It also makes subtle processing problems easier to identify.
Use the Built-In Comparison Options
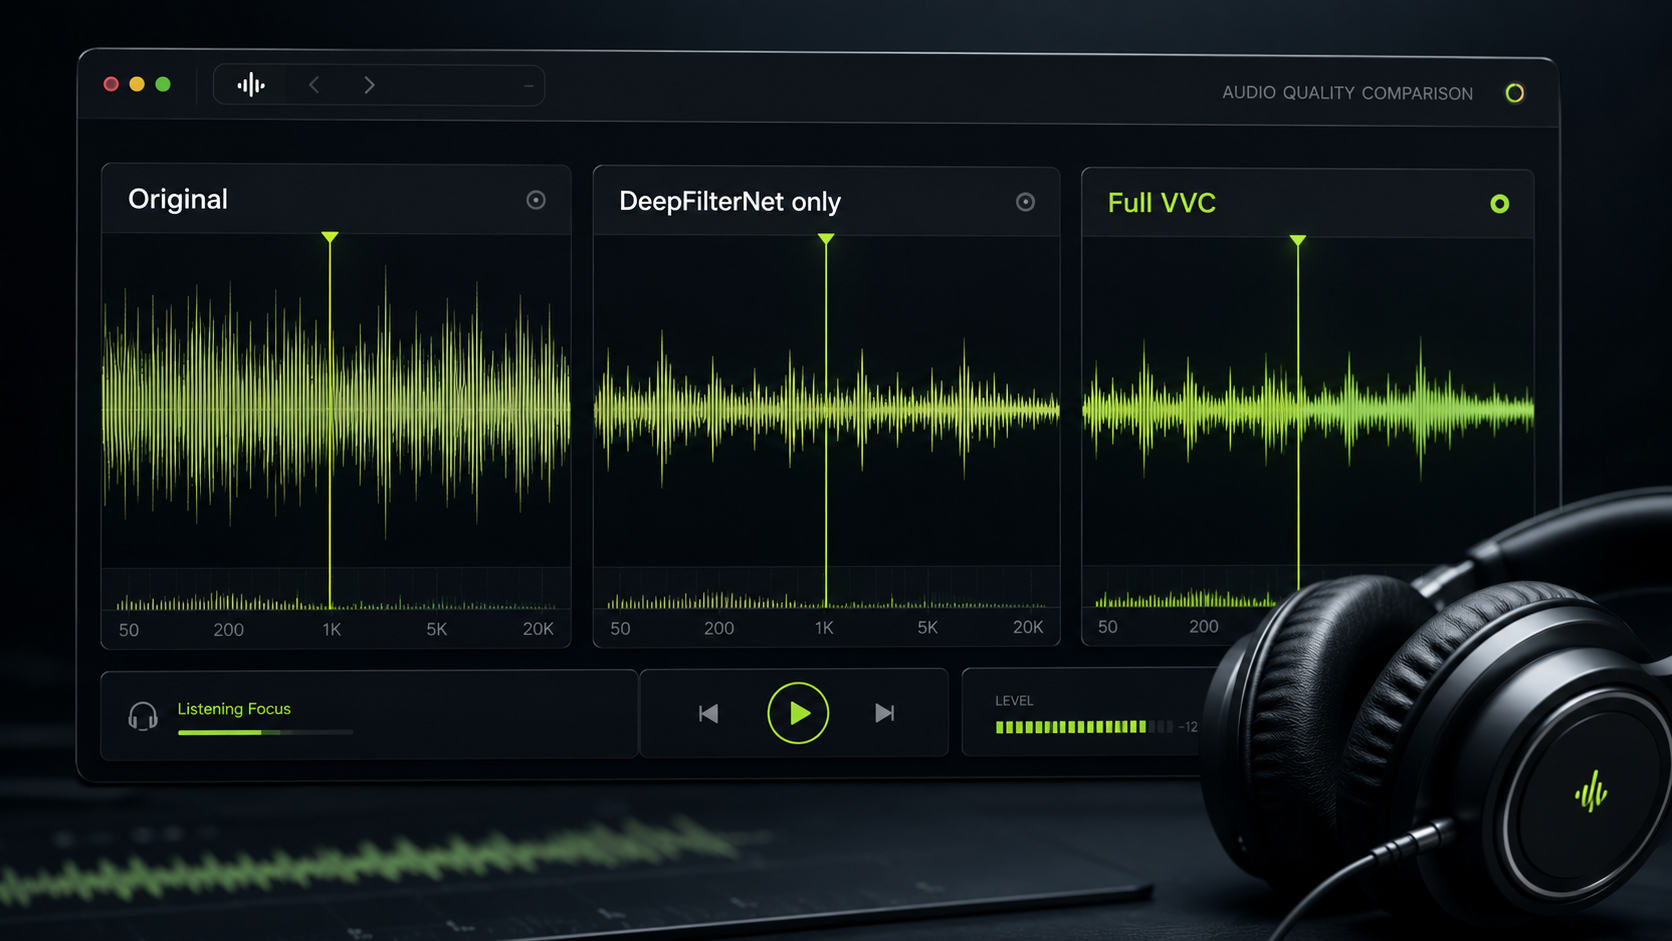
Video Voice Cleaner provides three versions for comparison. The first is the original recording, which lets you hear the source exactly as it was captured. The second is the DeepFilterNet-only version, which shows the result of the main noise-reduction stage. The third is the full Video Voice Cleaner version, which includes the additional processing used to restore presence and improve overall speech quality. Listening to all three versions helps separate useful improvement from processing that may be too strong. It also gives beta testers a clearer way to explain what worked and what did not.
The original recording provides the baseline. DeepFilterNet only shows what happens when the main background-noise reduction is applied without the later restoration stage. Full Video Voice Cleaner should usually sound clearer, more controlled and more natural than the original. It should also avoid becoming harsher or thinner than the DeepFilterNet-only result. There may be recordings where the simpler version sounds better, and that is useful information rather than an embarrassment. Different voices, microphones and background conditions can respond differently to the same processing chain.
What to Listen For
The most important question is whether the words are easier to understand. Clearer speech should require less effort from the listener, especially when the original contains wind, traffic, echo or room noise. Listen for consonants, endings of words and quiet syllables, because these are often the first parts of speech to be damaged by aggressive processing. Check whether the speaker still sounds recognisable and natural. A successful result should preserve the identity and character of the voice. It should reduce distraction without turning the speaker into a synthetic imitation.
Background noise should become less intrusive rather than simply disappear at all costs. Wind may become quieter, traffic may move further into the background and room noise may become less tiring. However, the recording should not pulse, pump or change level unnaturally between words. Pay attention to breaths, pauses and the spaces between sentences. If the background repeatedly appears and disappears in an obvious way, the processing may be too aggressive. A strong result usually sounds calmer and more controlled, not strangely empty.
Warning Signs of Overprocessing
Metallic speech is one of the clearest signs that the processing has gone too far. The voice may sound thin, brittle or as though it is coming through a poor telephone connection. Another warning sign is a watery or warbling quality around words. This often appears when the software struggles to distinguish speech from background sound. Missing consonants, shortened breaths and softened word endings can also reduce intelligibility. A cleaner recording is not useful if important parts of the voice have been removed with the noise.
You should also listen for artificial sharpness. Extra brightness can create the impression of clarity, but it may become unpleasant after several minutes. Harsh sounds such as “s”, “t” and “k” may become exaggerated. A processed voice can also feel unnaturally close or detached from the environment. Some background sound is often necessary to make a location recording feel believable. The aim is controlled reduction, not the total destruction of every sound that is not speech.
Compare Short Sections Repeatedly
Long comparisons are harder to judge because your ears quickly adapt to whatever you are hearing. A five to ten-second section is usually enough for a useful test. Choose a section that includes speech, a pause and some obvious background noise. Play the same section in the original, DeepFilterNet-only and full Video Voice Cleaner versions. Repeat the comparison several times at similar volume levels. This makes small differences much easier to detect.
Speech with clear consonants is especially useful for testing. Words containing “s”, “f”, “t” and “k” can reveal whether the processing has removed detail or added harshness. Pauses help you judge how naturally the background behaves when nobody is speaking. A section with both quiet and loud speech can show whether the processing handles changes in volume consistently. Avoid jumping between unrelated parts of the recording during the first comparison. Using the same short passage gives you a much fairer result.
Test With Headphones and Ordinary Speakers
Headphones are useful because they reveal distortion, pumping and other processing artefacts more clearly. They allow you to hear small changes that may be hidden by laptop or phone speakers. However, headphones should not be the only test. Many viewers will listen through phones, tablets, televisions or ordinary computer speakers. A recording that sounds excellent through studio headphones may behave differently on smaller speakers. The cleaned version should therefore be tested on more than one playback device.
Start with headphones to identify obvious faults. Then play the same section through the device most likely to be used by your audience. For a YouTube video, that may be a phone or laptop. For a family recording, it may be a television. For an interview, it may be both headphones and speakers. The best result is not merely technically impressive. It should work in the real listening conditions where the recording will actually be heard.
When DeepFilterNet Only Sounds Better
There may be cases where the DeepFilterNet-only result sounds better than the full Video Voice Cleaner version. This does not mean the whole process has failed. It may mean the later restoration stage is too strong for that particular voice, microphone or recording. It may also reveal a browser or device-specific issue. These cases are especially useful during beta testing because they show where the processing chain needs adjustment. Honest comparisons are more valuable than assuming the most processed version must always win.
If DeepFilterNet only sounds more natural, listen carefully to what changed in the full version. The voice may have become brighter, thinner or more compressed. Quiet details may have disappeared. The background may have become less natural. Note the device, browser, file type and recording conditions when reporting the result. Specific feedback makes it much easier to identify patterns and improve future versions.
Good Recordings for Testing
Useful test files contain speech that is audible but affected by a clear problem. Windy phone footage is ideal because it shows whether the software can reduce low-frequency disturbance without damaging the voice. Traffic, fans, air conditioning and crowd noise are also useful because they create steady competition around speech. Laptop recordings can reveal room noise, hiss and poor microphone quality. Interviews recorded at a distance provide another strong test. Budget microphones often expose problems that cleaner studio recordings hide.
Avoid using only perfect recordings. A clean studio voice may show very little difference because there is almost nothing to fix. At the other extreme, completely destroyed audio may not contain enough usable speech to recover. The most informative tests sit between those two points. The voice should still be present beneath the noise. That gives Video Voice Cleaner something real to improve. It also allows you to judge whether the result is clearer without expecting impossible reconstruction.
What Audio Cleaning Cannot Fix
Audio cleaning cannot recover words that were never captured. If a loud impact completely covers a sentence, the software cannot know exactly what was said. Severe clipping can also destroy information by flattening the waveform. A damaged microphone may create distortion that cannot be removed without affecting the voice. Recordings made from extreme distance may contain too little speech for reliable recovery. No audio cleaner can replace good microphone placement after the event.
The realistic goal is to improve speech that remains present beneath unwanted sound. Wind, traffic, fans, room noise and crowds can often be reduced when the voice is still audible. The result may become clearer, calmer and more comfortable to hear. It may also rescue a recording that would otherwise be difficult to use. However, every file has limits. A useful tool should improve real recordings without pretending that damaged audio can always be made perfect.
How to Make a Fair Final Decision
A cleaned version is better when it improves intelligibility without damaging the speaker. The voice should be easier to follow, but it should still sound natural. Background noise should become less distracting, but the recording should not feel unnaturally empty. Consonants and quiet syllables should remain clear. The result should work through headphones and ordinary speakers. Most importantly, you should prefer it after repeated level-matched comparisons, not merely because it sounded louder on the first listen.
Trust your ears, but give them a fair test. Compare short sections, match the volume and listen for both improvement and damage. Use all three Video Voice Cleaner versions rather than assuming the final stage must always be best. Note any metallic, watery or unnatural qualities. Report differences with details about the device, browser and file type. That process produces far more useful feedback than saying only that one version sounded louder.
Try Video Voice Cleaner
Choose a recording affected by wind, traffic, room noise or another clear background problem. Process it in Video Voice Cleaner and compare the original, DeepFilterNet-only and full versions. Use the same short passage for each test. Keep the playback levels similar and listen on more than one device. Your file remains on your device while the browser performs the processing. A careful comparison will tell you whether the result is genuinely better.
Try Video Voice Cleaner